On Extent
Where the Backsplash Stops
B&Co. Surfaces · October 21, 2026 · 4 min read
Choose the extent of a backsplash with the whole wall in view. Its upper edge should answer the cabinets, openings and fixtures around it, while its practical requirements are resolved for the particular installation. A favorite material is the beginning of that decision.
Draw the stopping line
Before comparing another sample, draw the wall that will receive it. Include the counter, the underside of the cabinets, any window and the adjoining wall. Mark where the proposed backsplash begins and ends. This simple elevation makes the decision specific: a band behind the counter, an infill below cabinetry, or a larger field with its own outline. Each deserves to be considered as a complete shape.
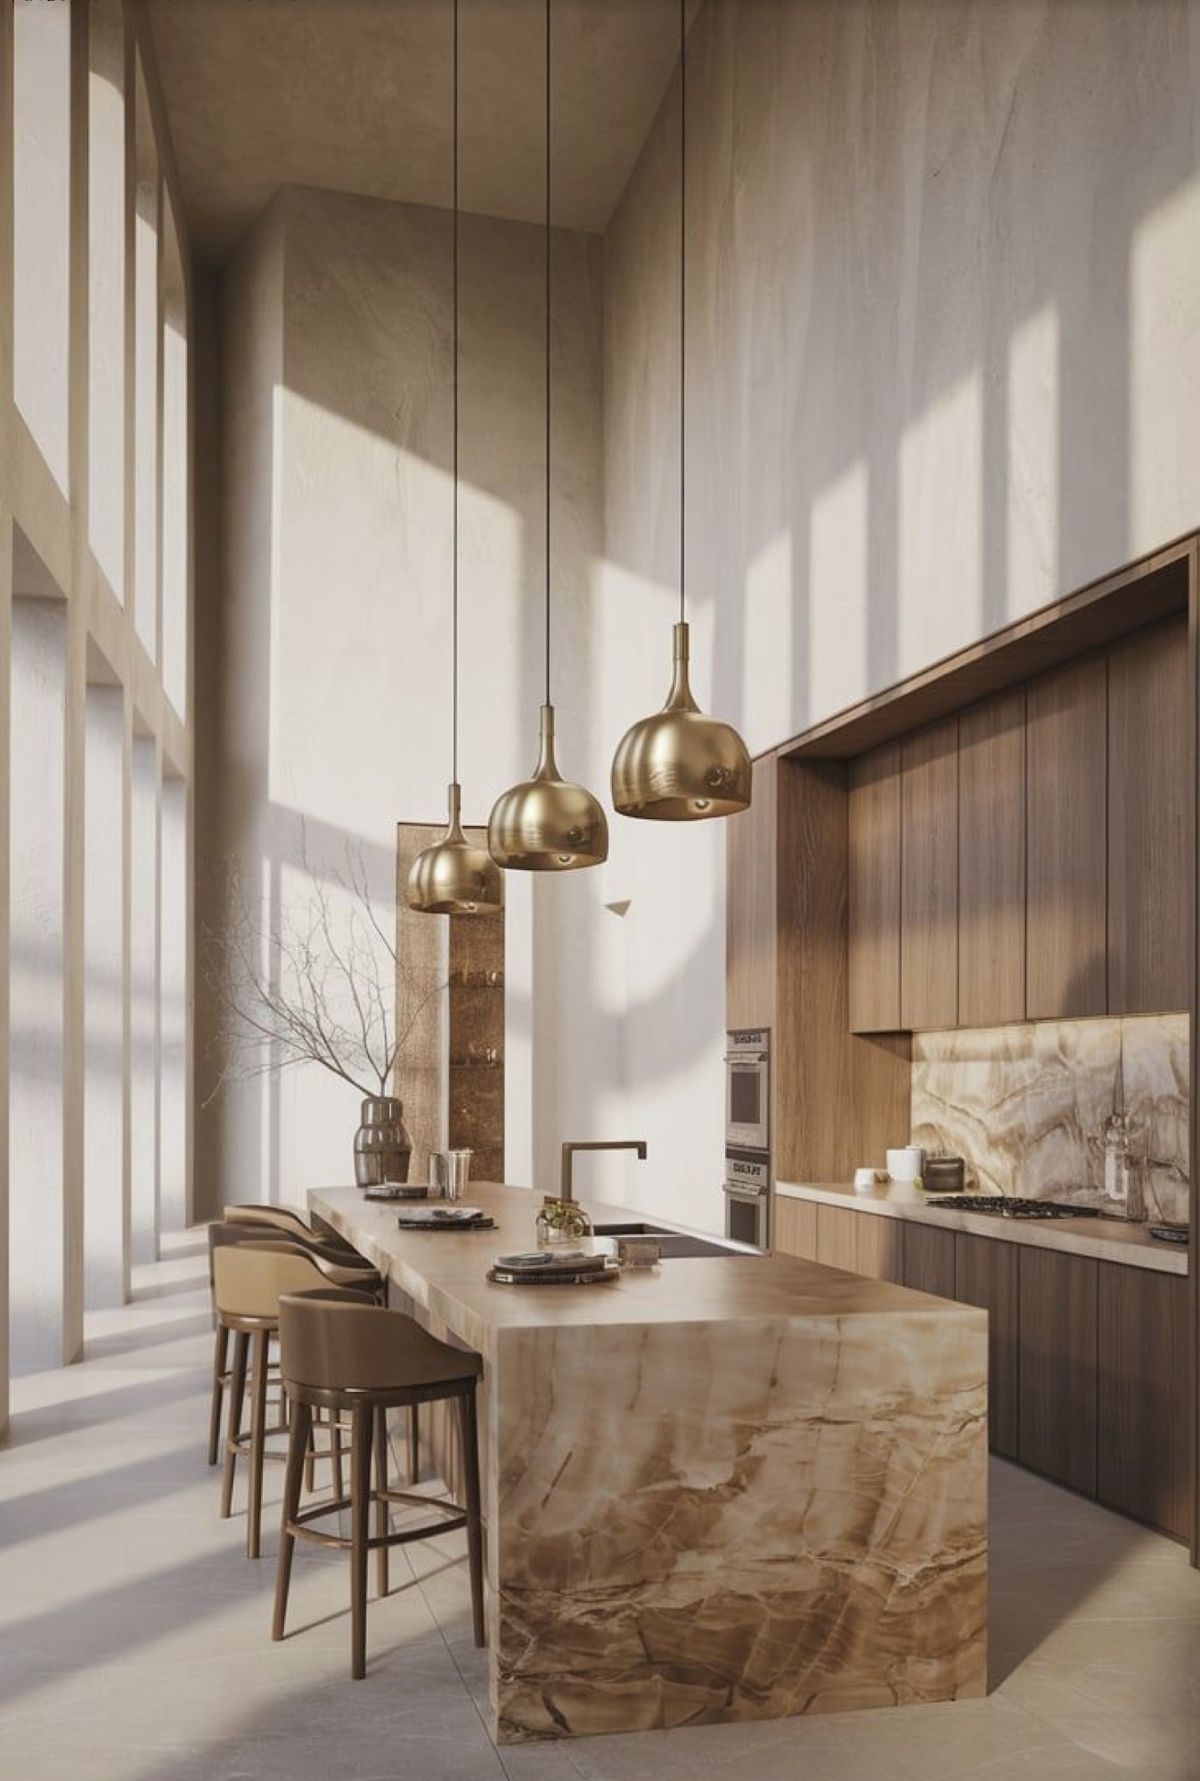
In the kitchen reference above, the patterned backsplash sits beneath wood cabinetry. Pale wall continues overhead, and the room has a much taller volume than the working recess. The material does not need to occupy that entire height to register clearly in the composition. Pinterest labels this reference AI-modified; its value here is the visible arrangement of planes, rather than evidence about a built installation.
Try drawing the same surface higher, then lower, while leaving everything else in place. Ask which version gives the cabinet run a clear beginning and end. If a larger field is preferred, identify what it contributes: perhaps a continuous backdrop or an intentional focal wall. Avoid extending it simply because the drawing has empty space. Give the boundary a reason that can be stated plainly.
The stopping line belongs to the room as much as it belongs to the material.
Let the openings participate
A window introduces another set of lines. Study its sill and jambs beside the proposed backsplash edge, including the return into the opening. An alignment may make the relationship legible; a deliberate separation may be equally convincing. Compare both on the elevation. The aim is to choose the relationship consciously, including the small exposed areas that can disappear in an overall rendering.
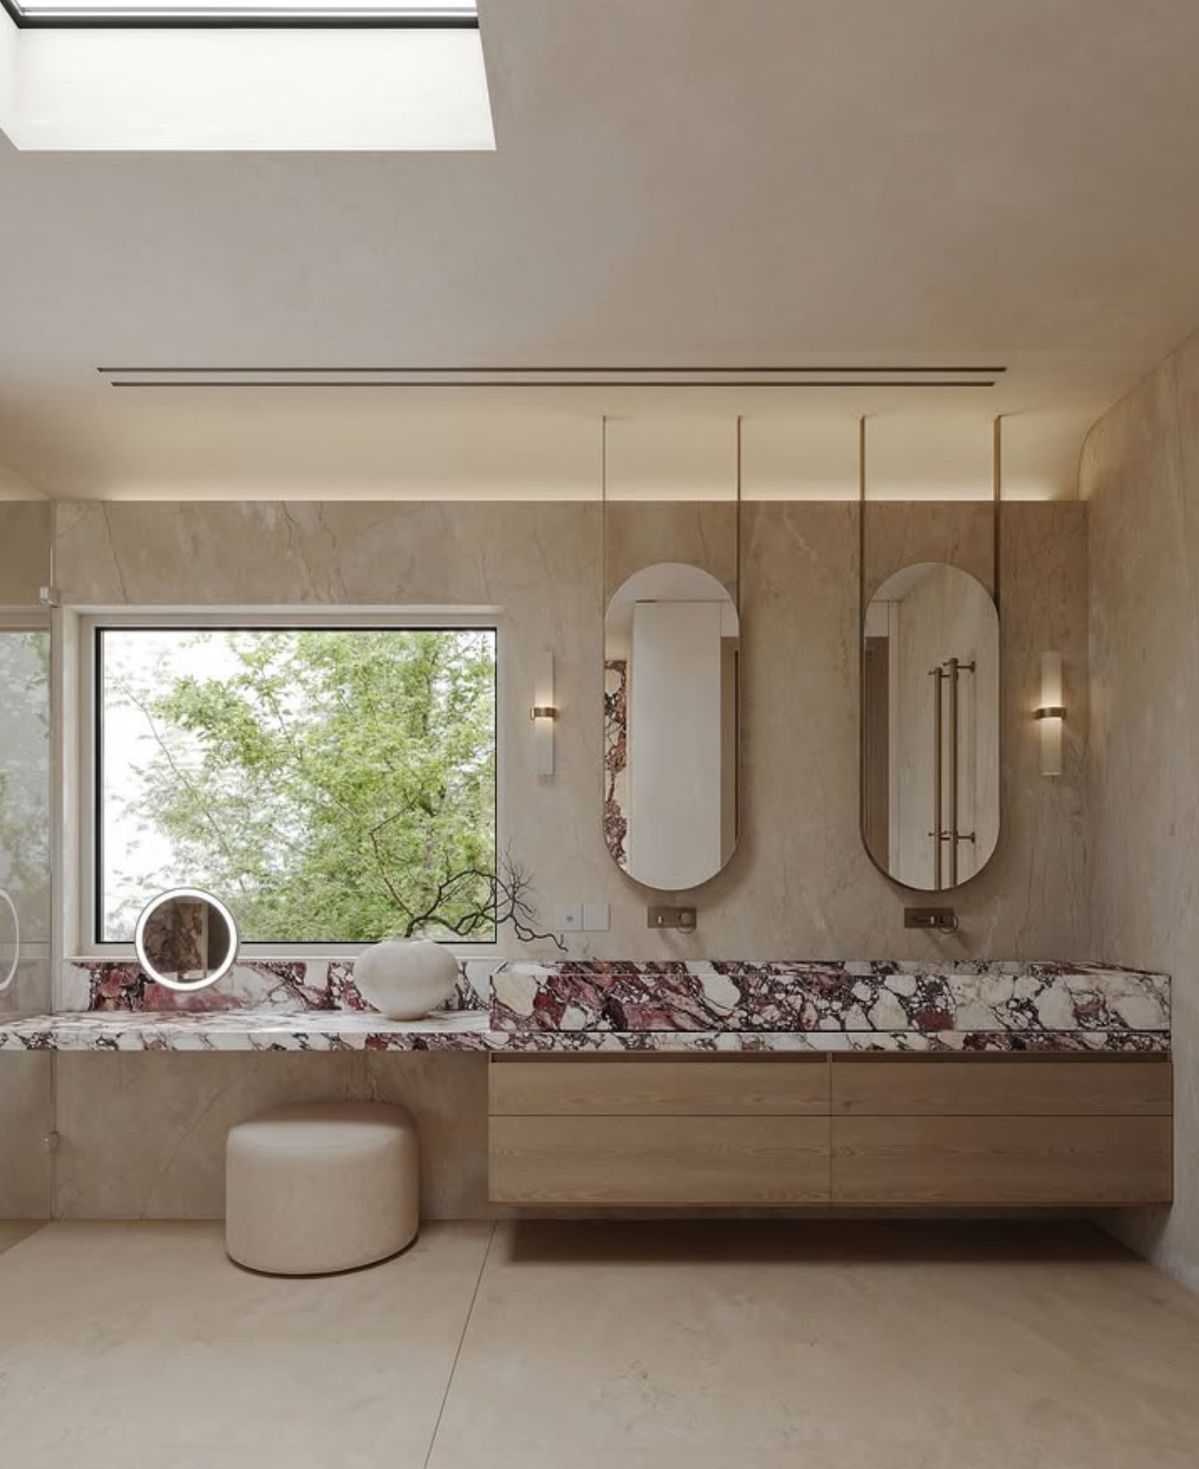
The bathroom reference below offers a different arrangement. A narrow, strongly patterned band runs along the vanity beneath a window and suspended oval mirrors. Pale wall remains visible around the mirrors. Look at the amount of patterned surface alongside the amount of open wall, and at the way the line meets the window. These visible relationships are useful to study without assigning a stone name, location or designer to the image.
A mirror should appear in the material drawing at its intended size and position. Review the space below it and beside it, then consider the side view from the doorway. A backsplash that seems settled in a straight-on image may still leave an unresolved end visible from that approach. Include that end in the decision before treating the principal elevation as approved.
Resolve the working wall
Now put the working details back into the picture. Show faucets, controls, receptacles and mounted accessories in their proposed positions. For a tiled backsplash, Daltile’s wall-tile installation guide calls for reviewing the substrate and following the adhesive or mortar instructions. Keep the specified product guidance beside the drawing, and ask the project designer and installer to confirm how edges and penetrations will be resolved. Do not infer those answers from an inspiration image.
Review the wall with the objects expected to remain on the counter. A lamp, a coffee appliance or a frequently used container belongs in this conversation if it will occupy the view every day. Give it a place on the drawing. This is an opportunity to decide whether the material should provide a quiet backdrop, frame a small working area or remain the main visual event.
Keep aesthetic approval and technical confirmation legible in the same set of notes. Record the preferred extent, then name any detail still awaiting an answer. A pleasing stopping line should not be mistaken for a complete installation instruction. Equally, a detail that satisfies the practical brief still deserves review for its proportion within the room.
Approve an elevation, not an isolated sample
B&Co. Surfaces presents its bathroom programs as stone, tile and fixtures resolved as one composition. Apply that idea to the approval itself. Review the proposed surface together with the cabinet finish, the opening and the fixture arrangement. Keep a marked elevation beside the material selection so that approval refers to both the chosen finish and the area it is intended to occupy.
At the final review, point to every place the surface stops. There should be a considered answer at the cabinet, the window, the mirror and the exposed end. Where an answer is missing, keep that portion open for resolution. A room does not need the greatest possible expanse of a beautiful material. It needs an extent that the rest of the room can support.